Are you one of the many parents who are unsure about how to install a rear-facing car seat correctly, putting your child’s safety at risk?
As a parent, you want to ensure your child’s safety on the road, but the process of installing a rear-facing car seat can be overwhelming, especially with the numerous regulations and guidelines to follow. This is where you need to take action to protect your child’s life.
In this article, you’ll learn the step-by-step process of installing a rear-facing car seat, including tips and tricks to ensure a proper fit and secure installation.
We’ll cover the essential steps, including choosing the right seat, reading the manufacturer’s instructions, and using the correct installation methods, such as the seatbelt or LATCH system.
Understanding the Basics of Rear Facing Car Seats
Now that we’ve covered the importance of choosing the right car seat for your child, let’s dive into the specifics of rear-facing car seats. This crucial aspect of car seat safety is often misunderstood, but it’s essential to understand the basics to ensure your child’s safety on the road.
What is a Rear-Facing Car Seat?
Rear-facing car seats are designed to face the rear of the vehicle, with the child’s back against the seat. This configuration is designed to protect the child’s head, neck, and spine in the event of a crash. Rear-facing car seats are typically used for children from birth to around 2-3 years old, depending on the child’s weight and height.
- The American Academy of Pediatrics (AAP) recommends keeping children in a rear-facing car seat until they reach the maximum weight or height limit, which is usually around 40 pounds or 40 inches tall.
- Rear-facing car seats are designed to distribute the force of a crash across the seat, rather than concentrating it on the child’s fragile neck and spine.
Key Features to Consider
When choosing a rear-facing car seat, there are several key features to consider. Look for a seat that is specifically designed for rear-facing use and has a sturdy, stable base. Some rear-facing car seats also come with additional features, such as adjustable headrests and built-in cup holders.
Common Misconceptions
One common misconception about rear-facing car seats is that they are only suitable for small children. However, many rear-facing car seats can accommodate children up to 40 pounds or more, making them a safe and practical option for families with older children.
With a solid understanding of the basics of rear-facing car seats, you’re now ready to move on to the next step: choosing the right rear-facing car seat and vehicle combination. This crucial step will help ensure that your child’s car seat is properly secured and safe for use.
Choosing the Right Rear Facing Car Seat and Vehicle Combination
Now that we’ve covered the basics of rear-facing car seats, it’s essential to select the right seat and vehicle combination to ensure a safe and secure ride for your child. The type of car seat and its compatibility with your vehicle will significantly impact the installation process and overall safety.
Seat Type and Size
When choosing a rear-facing car seat, consider the weight and height limits of the child, as well as the type of seat you need. Infant seats are designed for newborns and small babies, while convertible seats can be used for larger children. Some seats also come with built-in canopies or sunshades, which can provide additional protection from the sun.
- Look for seats that meet or exceed Federal Motor Vehicle Safety Standards (FMVSS) and are certified by reputable testing organizations, such as the National Highway Traffic Safety Administration (NHTSA).
- Consider seats with a five-point harness system, which provides superior protection and can be adjusted to fit your child’s size.
Vehicle Compatibility
Not all car seats are compatible with all vehicles, so it’s crucial to check the seat’s specifications and your vehicle’s manual to ensure a smooth installation. Some seats may require additional hardware or adapters to fit properly, while others may be designed specifically for certain vehicles.
- Check the seat’s LATCH (Lower Anchors and Tethers for Children) system, which provides a secure and easy installation process.
- Consider seats with a built-in anti-rebound bar, which can help prevent the seat from rebounding in the event of a crash.
With the right seat and vehicle combination, you’ll be well on your way to ensuring a safe and secure ride for your child. In the next section, we’ll walk you through the step-by-step installation process for rear-facing car seats.
Preparing for Installation: Essential Tools and Safety Checks
Now that you’ve selected the perfect rear-facing car seat for your child, it’s time to prepare for a safe and secure installation. Before you start, make sure you have the right tools and knowledge to ensure a proper fit and prevent common mistakes. (See: Clean Infant Car Seats)
Essential Tools for Installation
Having the right tools can make a huge difference in the installation process. You’ll need a few basic items, including a level, a measuring tape, and a seatbelt lockoff (if your vehicle requires it). Some car seats also come with their own installation tools, such as a seatbelt routing clip or a car seat base leveler. Take a few minutes to review your car seat’s instructions and familiarize yourself with any specific tools required.
- A level ensures your car seat is installed at the correct angle, which is typically between 30-45 degrees.
- A measuring tape helps you measure the distance between the car seat and the vehicle’s seatback to ensure proper fit.
Safety Checks and Pre-Installation Precautions
Before you start installing your car seat, take a moment to inspect your vehicle’s seat and surrounding areas. Check for any loose items, such as floor mats or seat cushions, that could interfere with the installation process. You should also ensure that your vehicle’s seatbelt is not damaged or frayed, as this could compromise the seat’s safety features. Additionally, take a look at your car seat’s expiration date and manufacturer’s instructions to ensure you’re installing it correctly and safely.
With your tools and safety checks in place, you’re now ready to move on to the installation process. Stay tuned for our step-by-step guide on how to install a rear-facing car seat safely and securely.
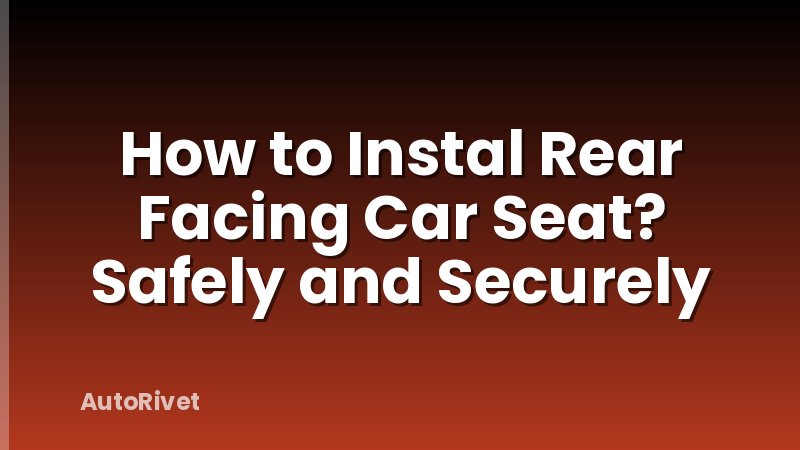
Step-by-Step Installation Guide for Rear Facing Car Seats
Now that you’ve chosen the right rear facing car seat and vehicle combination, it’s time to move on to the actual installation process. This crucial step requires attention to detail and a clear understanding of the manufacturer’s instructions. To ensure a safe and secure installation, follow these step-by-step guidelines.
Step 1: Read and Understand the Manufacturer’s Instructions
The manufacturer’s instructions are your go-to guide for installation. Take the time to read through them carefully, paying attention to the specific requirements for your car seat model and vehicle. This will help you avoid common mistakes and ensure a proper fit.
- Check the seat’s weight and height limits, as well as any specific installation requirements, such as the use of a top tether.
- Understand the different types of installation methods, including the use of LATCH (Lower Anchors and Tethers for Children) or seat belts.
Step 2: Choose the Correct Installation Location
Identify the safest location in your vehicle for the rear facing car seat. Typically, this is the middle seat in the back row, as it provides the most protection in the event of a crash. Ensure that the seat is not obstructed by other passengers or objects, and that it can be installed with a clear path to the seat belt or LATCH connectors.
- Measure the distance between the seat back and the seat cushion to ensure there’s enough space for the car seat.
- Check the vehicle’s seat back for any obstructions, such as seatbelt anchors or headrests.
Step 3: Install the Rear Facing Car Seat
Once you’ve chosen the correct installation location, it’s time to install the rear facing car seat. Follow the manufacturer’s instructions for securing the seat to the vehicle using either the seat belt or LATCH connectors. Make sure the seat is level and secure, and that all harness straps are properly adjusted.
With these steps complete, you’ve successfully installed your rear facing car seat. However, ensuring proper fit and safety requires more than just a correct installation – it also involves avoiding common mistakes and understanding the key benefits of rear facing car seats.
Ensuring Proper Fit and Safety: Common Mistakes to Avoid
Now that you’ve successfully installed your rear-facing car seat, it’s essential to ensure that it’s fitted correctly and securely in your vehicle to guarantee the safety of your child. A poorly fitted car seat can compromise the effectiveness of the safety features, putting your child at risk of injury in the event of an accident.
Insufficient Tightening and Securement
One of the most common mistakes parents make when installing a rear-facing car seat is not tightening it enough or failing to secure it properly. This can lead to the seat shifting or moving during a crash, which can cause serious injury to your child. Always follow the manufacturer’s instructions for tightening and securement, and double-check that the seat is firmly in place before each use.
- Make sure to tighten the seatbelt or LATCH system according to the manufacturer’s specifications, and don’t be afraid to use extra force if necessary.
- Check the seat’s position regularly to ensure it’s not shifting or tilting forward, which can compromise its effectiveness.
Incorrect Angle and Positioning
Another critical aspect of rear-facing car seat installation is ensuring the correct angle and positioning. If the seat is too reclined or too upright, it can compromise the effectiveness of the safety features. Always follow the manufacturer’s guidelines for the correct angle and position, and make adjustments as needed to ensure the seat is at the optimal angle.
By avoiding these common mistakes and ensuring your rear-facing car seat is fitted correctly and securely, you can have peace of mind knowing that your child is safe and protected in the event of an accident. This sets the stage for a comprehensive review of the key benefits and advantages of using a rear-facing car seat, which we’ll explore in the next section.
Key Benefits, Advantages, and Best Practices for Long-Term Safety
With the rear-facing car seat installed correctly, you’ve taken a significant step towards ensuring your child’s long-term safety on the road. Now, let’s explore the benefits and best practices that come with this crucial investment. (See: Recline Chicco 360 Car Seat)
Reduced Risk of Fatal Injuries
The American Academy of Pediatrics (AAP) recommends that children ride in rear-facing seats until they are at least two years old or until they reach the maximum weight or height limit of their car seat. By doing so, you significantly reduce the risk of fatal injuries in the event of a crash. In fact, studies have shown that rear-facing car seats can reduce the risk of fatal head and neck injuries by up to 75%.
- The National Highway Traffic Safety Administration (NHTSA) estimates that using a rear-facing car seat can reduce the risk of fatal injuries in children under the age of four by up to 60%.
- Rear-facing car seats also help to distribute the force of the crash across the back of the seat, rather than allowing it to be absorbed by the child’s head and neck.
Long-Term Safety and Development
Rear-facing car seats not only provide short-term safety benefits but also play a crucial role in your child’s long-term development. By allowing your child to ride in a rear-facing position, you’re giving them the freedom to move and stretch their legs, which can help to prevent hip dysplasia and other musculoskeletal issues.
As you continue to prioritize your child’s safety, it’s essential to remember that regular maintenance and inspections of your car seat are crucial to ensuring its effectiveness. In our next section, we’ll explore the importance of proper fit and safety, and how to avoid common mistakes that can compromise your child’s safety on the road.
Key Takeaways
Installing a rear-facing car seat correctly is crucial for your child’s long-term safety and well-being. Follow these essential takeaways to ensure a secure and proper fit.
- Choose a rear-facing car seat that fits your child’s age, weight, and height, and select a vehicle seat with a compatible anchor system.
- Before installation, check your vehicle’s manual and the car seat’s instructions to ensure compatibility and understand the necessary tools and safety checks.
- Follow the step-by-step installation guide, using the LATCH (Lower Anchors and Tethers for Children) system or seatbelt, and ensure the car seat is installed at a 45-degree angle.
- Avoid common mistakes like over-tightening the seatbelt or using a seatbelt with a seat cover, which can compromise the seat’s stability and safety.
- Regularly inspect the car seat for wear and tear, and replace it every 6-10 years or according to the manufacturer’s guidelines to ensure your child’s continued safety.
- For long-term safety, always use a rear-facing car seat until your child reaches the maximum weight or height limit, typically between 2-4 years old.
Frequently Asked Questions
What is a Rear Facing Car Seat?
A rear-facing car seat is a type of car seat that has the child’s back against the seat, facing the rear of the vehicle. This type of seat is designed to protect the child’s head, neck, and spine in the event of a crash. Rear-facing seats are typically used for infants and toddlers until they reach a certain age or weight limit.
How do I Choose the Right Rear Facing Car Seat for My Child?
To choose the right rear-facing car seat, consider your child’s age, weight, and height. Look for a seat that meets the federal safety standards and has a harness system that can accommodate your child’s size. Check the seat’s expiration date and read reviews from other parents to ensure you’re getting a high-quality seat.
Why Should I Use a Rear Facing Car Seat?
Rear-facing car seats are designed to reduce the risk of serious injury or death in the event of a crash. By keeping your child’s back against the seat, the force of the impact is distributed across the seat and not directly on your child’s fragile spine and head. Using a rear-facing seat can also help prevent whiplash and other types of injuries.
When Can My Child Transition to a Forward Facing Car Seat?
The American Academy of Pediatrics recommends that children use a rear-facing seat until they reach the maximum weight or height limit, which is usually around 2 years old or 30-40 pounds. However, this can vary depending on the seat and your child’s growth rate. Check your seat’s manufacturer instructions and consult with your pediatrician for guidance.
How do I Install a Rear Facing Car Seat Correctly?
To install a rear-facing car seat correctly, follow the manufacturer’s instructions and use the vehicle’s LATCH system or seatbelt. Make sure the seat is level and secure, and that the harness is snug and even. Check the seat’s fit by performing a “pinch test” on the harness straps. (See: Change Car Seat Facing Forward)
Can I Use a Rear Facing Car Seat in a Booster Seat?
Can I Use a Rear Facing Car Seat in a Booster Seat?
No, rear-facing car seats are designed to be used in the vehicle’s back seat, not in a booster seat. Rear-facing seats are typically equipped with a base and a seat unit, which are connected by a harness system. Booster seats, on the other hand, are designed to lift your child up to the vehicle’s seatbelt, but they do not have the same level of protection as a rear-facing seat. Always follow the manufacturer’s instructions and use a rear-facing seat in the vehicle’s back seat for optimal safety.
How Often Should I Check the Rear Facing Car Seat’s Expiration Date?
It’s recommended to check the rear-facing car seat’s expiration date at least every 6-12 months, or when your child outgrows the seat. The expiration date is usually printed on the seat’s label or manufacturer’s instructions. Make sure to replace the seat with a new one if it’s past its expiration date, as the materials and design may have degraded over time, compromising its safety.
Final Thoughts
By following this comprehensive guide, you’ve gained the knowledge and confidence to properly install a rear-facing car seat, ensuring the safety and well-being of your precious cargo. You’ve learned how to choose the right seat and vehicle combination, prepare for installation, and avoid common mistakes.
The most critical takeaway from this guide is the importance of rear-facing car seats for young children. Installing a rear-facing seat correctly can significantly reduce the risk of serious injury or even death in the event of a collision. Don’t underestimate the impact of a correctly installed rear-facing seat on your child’s safety – it’s a game-changer.
Now that you’ve completed this guide, take the next step by double-checking your seat’s installation and ensuring it meets all safety standards. Regularly inspect and maintain your seat to guarantee your child’s continued safety on the road. Together, we can make our roads safer for everyone.